OK! I am back!!! Now I know I said I was stupid for waiting so late and you will just have to forgive me for that.... So I couldn't bring myself to make anything out of the disasters I have made so I am going to show them to you so that you know what NOT to do when you try them.
My first effort was salt dough. Now I have made pendants out of clay and toilet paper but I never thought to make my own dough. So I saw it on pintrest(go figure) It's simple really, 2 cups flour, 1 cup salt, and cold water. Mix everything together until it is the consistency of play dough. once stamped bake at 250* for 2 hours! My son was home sick yesterday so we decided to play. We used almost a cup of water but it will vary depending on where you are and climate and everything. So here we are making this dough and all I have in the house is course sea salt. I thought that's OK, I will pull out my ninja and process it until it is smooth almost like powder.... so I did. WELLLLL I guess it was not quite as fine as I thought it was cause once we stamped them and cut them and colored some of them then baked them they turned out like this......

Although you can't see it very well there are huge hunks of salt showing.. Not at all like we wanted it to be....

These we colored the dough with food coloring then rolled them together for the Tye-dye effect. Still you can feel the salt in them but we used bombshell stamps anyway!!!

This one we stamped before we baked and now with it stained with distress stains you can see the chunks of salt still in them and quite honestly while they are fun to play with with my kids ( 16 and 13 and still like play dough :)) yeah I am an awesome mom!!! LOL ) I would never use them on a project so I quickly ok lets do something else....
SO I came down to the dungeon and grabbed some paint and a piece of 140lb watercolor paper and said I'll do acrylic transfer! ( Another project I saw on Pintrest). Pretty simple right? All you do is throw some paint on a paper or canvas and place a photocopy of an image on it and let it dry then rub it off with water right.... NOT SO FAST BULLSEYE!!!! First of all make sure you have ink in the printer... I didn't so I went to some stamped images I have... Not thinking that because they were on cardstock it would take longer for them to dry. YES I KNOW I HAVE THE IMAGES AND I COULD HAVE STAMPED THEM ON COPY PAPER BUT I PANICKED!!!! Don't judge me! LOL
So I throw some paint on the paper and then throw the images on them and wait.... and wait... and wait... well the instructions say you can dry them with a heat gun if you let them air dry for 15 mins first.....ummmmmm not in this case... best bet is to let them air dry until they are completely dry.... I'll just show you...
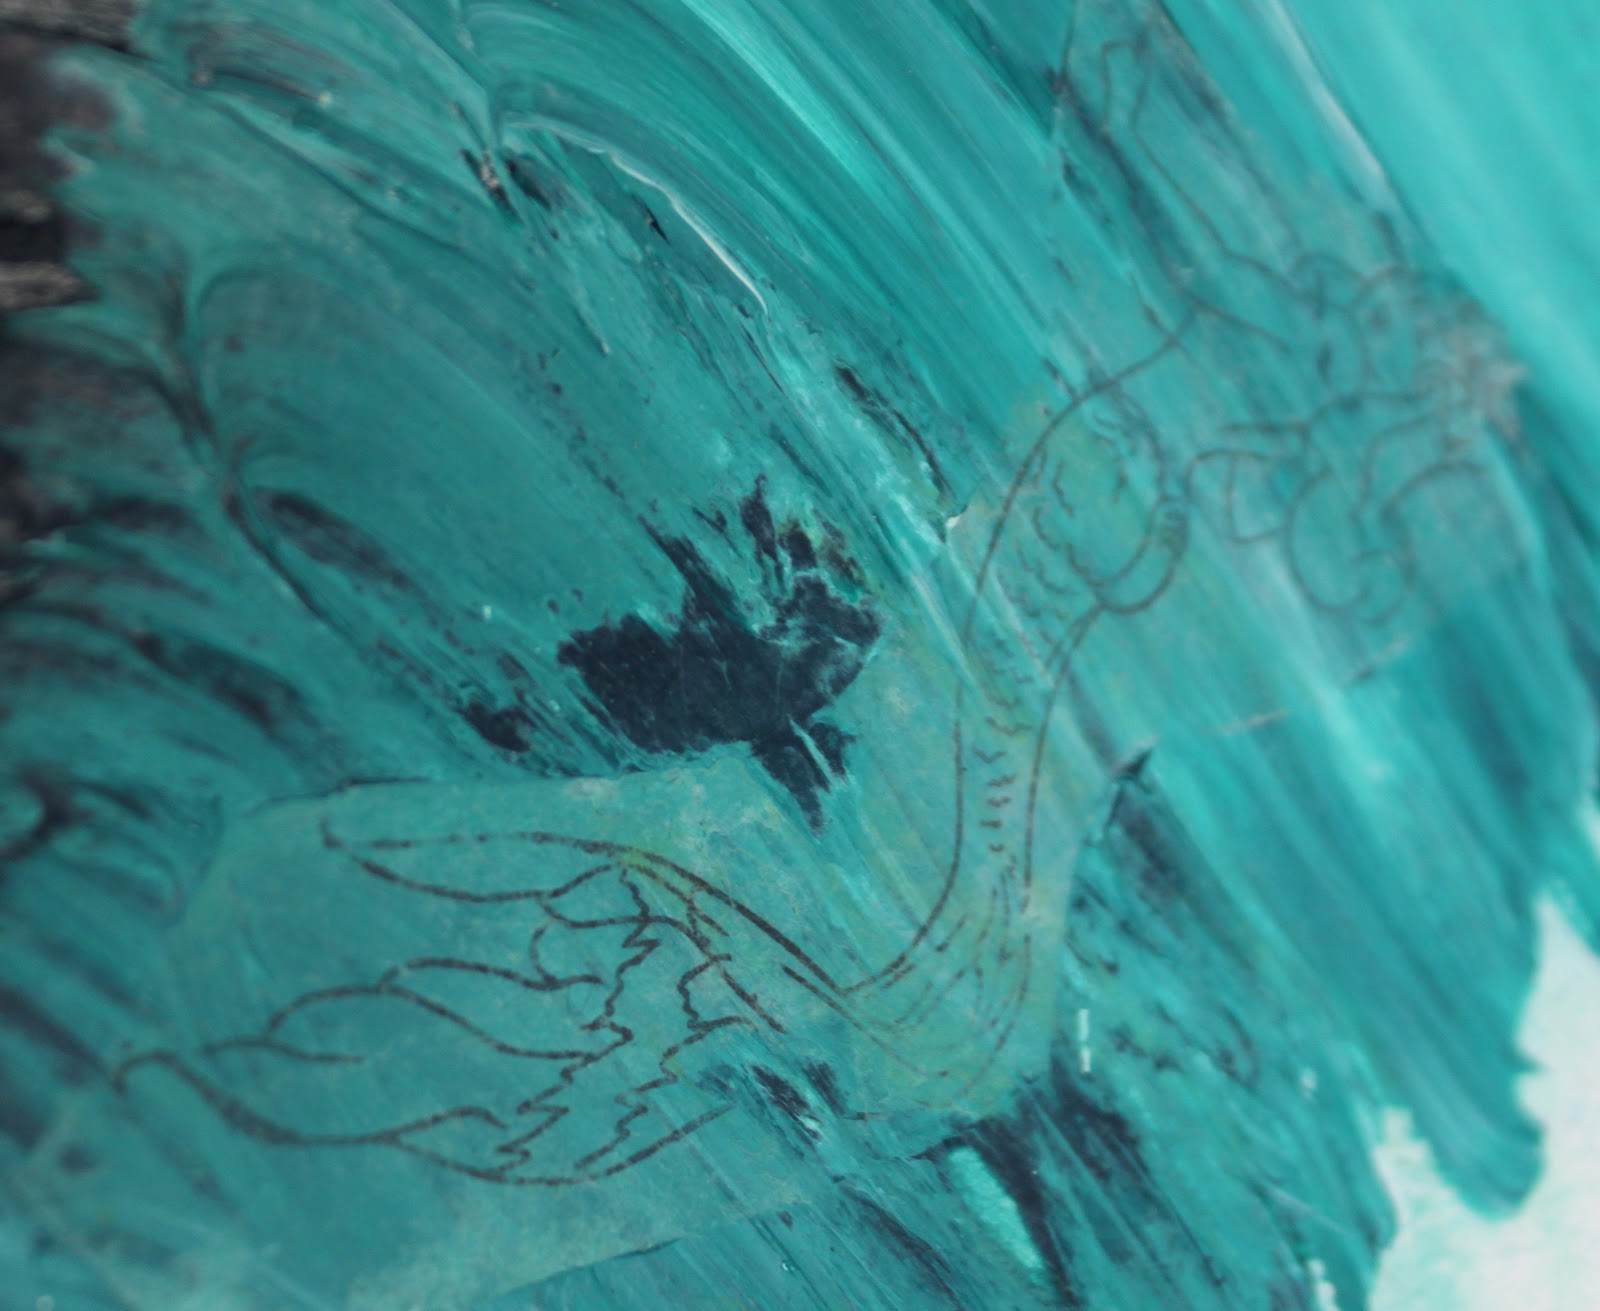
This is what happens when you let it air dry... As you can see I am not quite happy with it so I am turning this into a mixed media page.....Will post when it gets done but don't hold your breath cause it may be a while!

The orange is what happens when you don't let the paint dry enough and the yellow is what happens when you dry it with the heat gun..... it's alright but not nearly what I wanted... so thankfully it's on the same paper as the mermaid and will be part of the mixed media... you can see a little bit of the other elements already, the purple is a stamp I made with left over mounting foam and rubberbands and the other is plastic canvas mesh stuff....
Here is the blog roll which you have probably already been through but just in case you haven't! Enjoy your hop and remember to comment to win awesome prizes!!!
Bombshell Blog: http://bombshellstamps.blogspot.com/
Alison: http://alisonsrandomthoughts.blogspot.com
Laura: http://craftylittlewoman.blogspot.com/
Alaine: http://missalaineousmosaics.blogspot.com/
Sparkly Mary: http://sparkly-train.blogspot.com
Meredith: www.papercanteen.com
Cheryl: http://inktrap.blogspot.com
Paula: http://heyheypaula-heyheypaula.blogspot.com/
Kelli: http://www.cajunstampingqueen.blogspot.com
Stempelientje: http://stempelientje.blogspot.com/
Glittery Katie: http://ferrishyn-frontier.blogspot.com
Kathi: http://kathstales.blogspot.com
10 comments:
I'm sorry things didn't turn out quite how you had hoped, but I still enjoyed your pictures and explanations.:) And I'll look forward to your mixed media page, whenever you make it. I think it will be really cool! *hugs*
Hi Kelli! Here is my word o' wisdom..."Remember, there are no mistakes in art. There are only flopportunities!"
Torrey
I think the results are cool. And if you can use them, all the better. And if you learn from your "mistakes", even betterer. *grin*
Poor Kelli! You tried so damn hard! You get an A for effort...and a couple of gold stars thrown in there too! I like what Torrey said....she's right. Well, at least now we all know what NOT to do! Mwah!
I guess that was so much fun to do with your kids! Playing with dough is always nice!
I understand about things not working the way you want them too. I will not even begin to count the things that have been sent to recycling. I just hate it when something doesn't work the way I want. At least you now know what not to do.
I totally understand about the things not working quite right! And you will laugh - I saw your first picture and thought "HOW COOL IS THAT - YOU MADE COOKIES out of Bombshell Stamps." :-)
Thank you for posting it and explaining so you help us all out in the future.
That paint is an interesting idea. I like the way the mermaid turned out, but I'm not entirely sure how to do the technique. This would be perfect for step-by-step with instructions.
Goodness - you had such a stressful time of this !!! Great to get to play with the kiddies though xxx I loved the mermaid and would like to see that in a future project and how about doing a TuT on that paint + stamp technique.... it sounds really cool. :-D xxxxxxxxxxxxx
thanks for sharing your attemps with us :)now we all know what not to do :) But I think that heart did turn out pretty cool.
Post a Comment